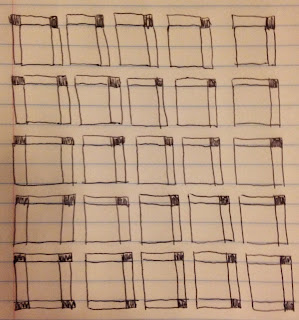
For my version of the Blogger Girl’s Block of the Month quilt, I made 13 of the blocks designed by Monique Dillard (I made a 3rd version of the April block). I also made 12 alternate chain blocks for a total of 25 blocks that I will piece into 5 rows of 5 blocks each.
To get the size quilt I want, I need to add 2 ½” X 12 ½” sashing strips and 2 ½” X 2 ½” cornerstones between each of the blocks and round the perimeter of the central block section.
How do you sew sashing onto your quilt tops?
I always used to sew the sashing in long strips between the rows of blocks but invariable something was off somewhere along the way and I’d end up with a pucker.
Now I prefer to add the sashing directly to each individual block. Here’s how to do that for a quilt with 25 blocks:
For a 25 block quilt you will need to cut 60 2 ½” X 12 ½” sashing strips in your background or sashing fabric and 36 2 ½” X 2 ½” squares of your cornerstone fabric.
Sew one 2 ½” X 2 ½” square to one end of 35 sashing strips then sew one 2 ½” X 2 ½” square to both ends of 1 sashing strip.
Sew a plain sashing strip (no cornerstone attached) to the top edge of all 25 blocks. Then sew a sashing strip with a cornerstone attached to the right edge of each block so you end up with a block like this:
If you have blocks with directional fabrics you need to pay attention to the orientation of your blocks. If you also planned the layout of your blocks you may want to take a picture of your layout to refer to for this next part. Remembering that I’m alternating these blocks with chain blocks, my block layout is like this:
Next you will add a sashing strip with a cornerstone attached to the left edge of 4 blocks and to the bottom edge of another 4 blocks, like so:
For the block that will be placed in the lower left corner you will add one sashing strip with a cornerstone attached to the bottom and on the left side you will attach the one sashing strip with a cornerstone on each end:
Here is an example of what a 9 block layout will look like with the sashing strips and cornerstones added:
When you're finished attaching the sashing you end up with larger blocks. Then it’s just a matter of sewing the blocks into rows. No long sashing strips to worry about and no puckers!!


No comments:
Post a Comment